Angular Animationsを初めて使ってみた
Angularを使ったWebアプリを作り際も、CSSのアニメーションしか使わない場合が多かったのですが、Angular Routerと連携したアニメーションや複数の要素に対するアニメーションなどを実現するためにAngular Animationsを使ってみることにしました。
そもそも今まで触ったことなかったので、気にしてなかったけど、どうやらv4.2以上ではアニメーション関連が強化されているらしい。 今回紹介する内容では、v5.1.1を使っています。
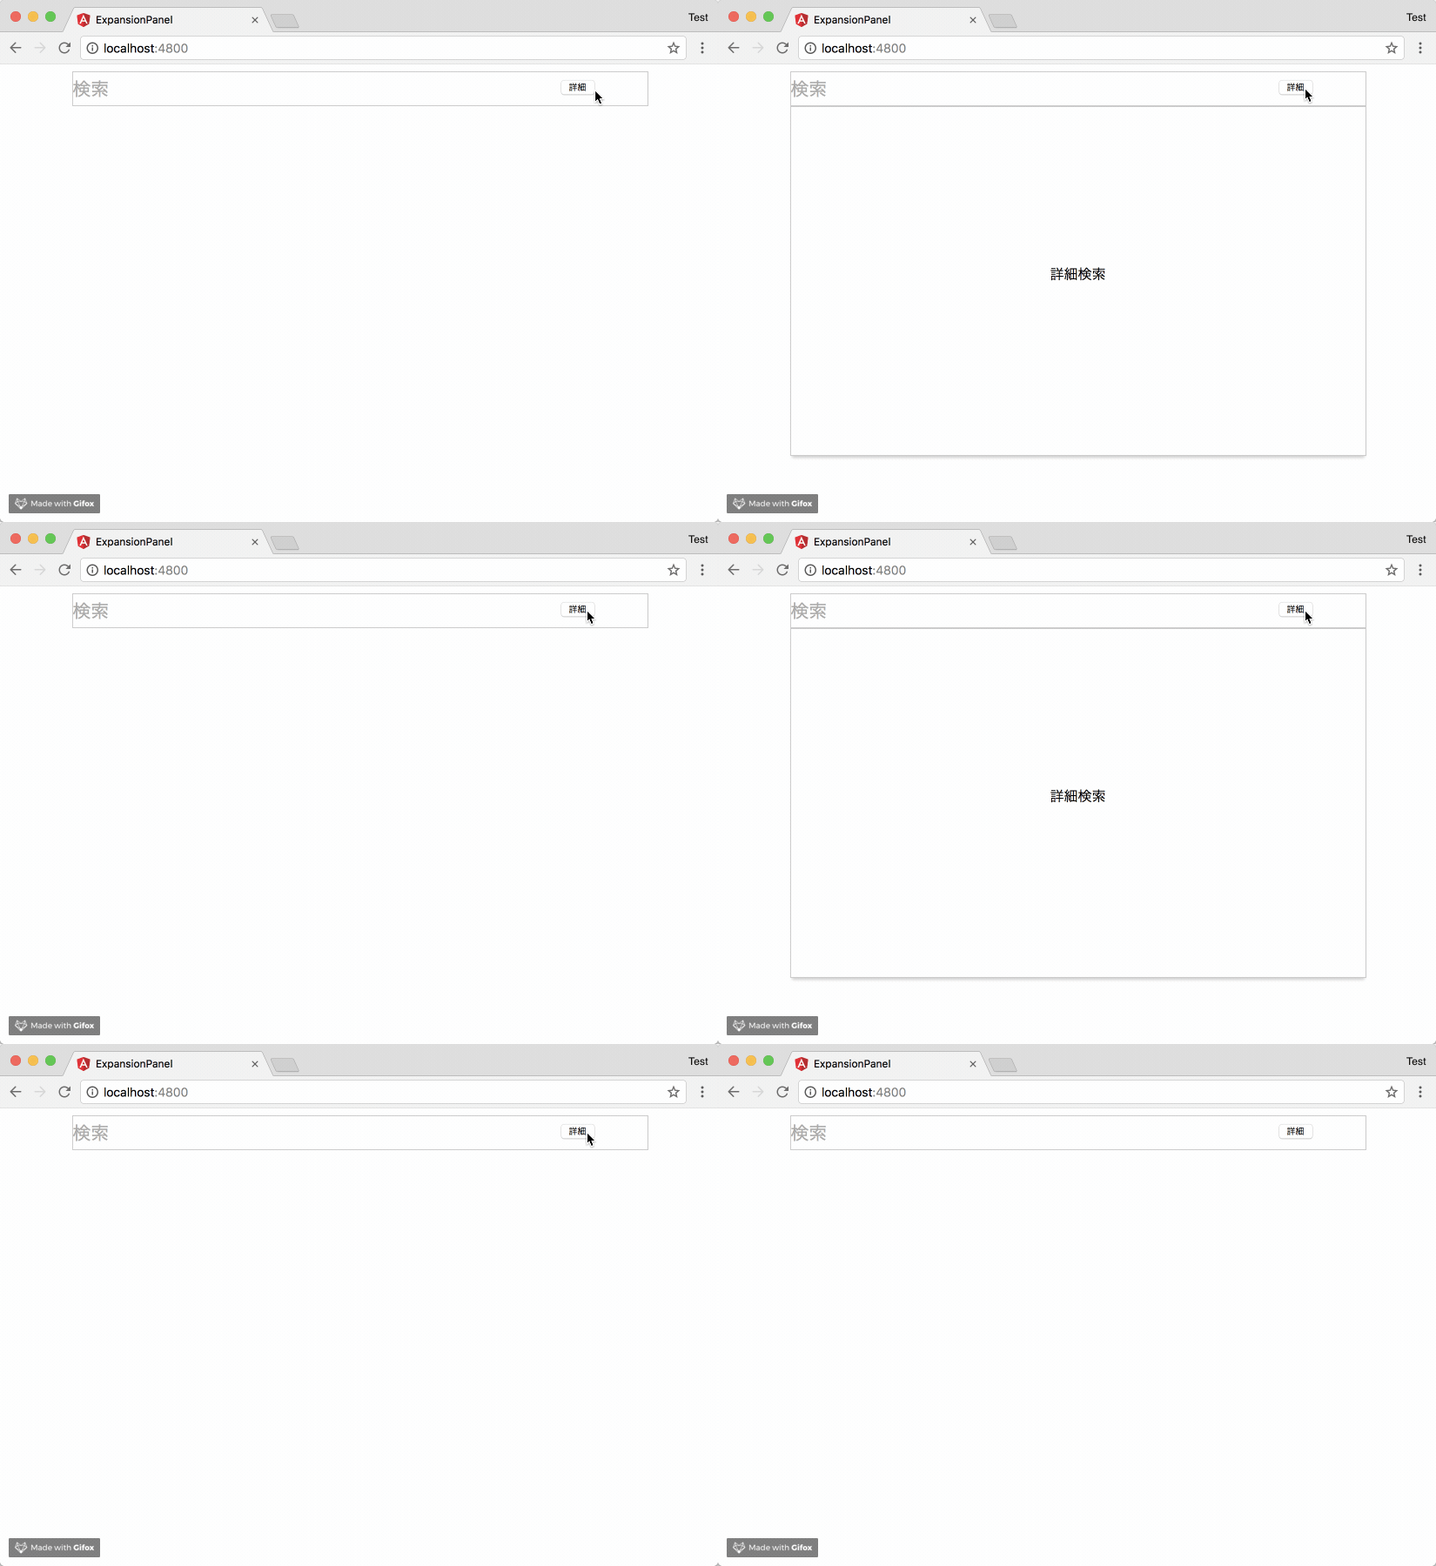
今回は、単一のコンポーネントにごく単純なFade In-Outアニメーションをさせてみたいと思います。 具体的には次のようにぬるっと表示される詳細検索パネル(風)のものです。

事前準備
今回は、次のコマンドでサンプルのプロジェクトを作成しました。
$ ng new expansion-panel --inline-style --inline-template
また、app.moduleにBrowserAnimationsModuleをインポートしておきます。
import { BrowserAnimationsModule } from '@angular/platform-browser/animations';

...
  imports: [
    BrowserModule,
    BrowserAnimationsModule
  ],
...
検索ボックス
まずは検索ボックスです。
テンプレートには、input要素と、buttonを配置しているだけです。
「詳細」ボタンを押した際に、親のコンポーネントにボタンが押されたことを通知したため、OutputとEventEmitterを使っています。
search.component.ts
import { Component, Output, EventEmitter } from '@angular/core';

@Component({
  selector: 'app-search',
  template: `
    <div>
      <form>
        <input type="text">
      </form>
      <button (click)="onClickPanelOpen()">詳細</button>
    </div>
  `,
  styles: [`
    :host {
      position: fixed;
      top: 50;
      z-index: 99;
      left: 50%;
      margin-left: -40%;
      width: 80%;
    }
    input {
      padding: 0;
      font-size: 1.3em;
      font-family: Arial, sans-serif;
      color: #aaa;
      border: solid 1px #ccc;
      margin: 0;
      height: 38px;
      width: 100%;
      background-color: #ffffff;
    }
    button {
      width: 40px;
      font-size: .3em;
      position: relative;
      top: -36px;
      left: 85%;
    }
  `]
})
export class SearchComponent {
  @Output() panelOpen = new EventEmitter<boolean>();
  private panelState = false;

  onClickPanelOpen() {
    this.panelState = !this.panelState;
    this.panelOpen.emit(this.panelState);
  }
}
詳細検索パネル
こちらは、詳細検索パネル(風)です。今回は、アニメーションの例なので詳細検索に関する機能は省いていますが...
親のコンポーネントで見通しが良くなるよう別ファイルにしていますが、特にロジックを持たないコンポーネントです。
panel.component.ts
import { Component } from '@angular/core';

@Component({
  selector: 'app-panel',
  template: `
    <p>詳細検索</p>
  `,
  styles: [`
    :host {
      position: fixed;
      top: 48px;
      z-index: 99;
      left: 50%;
      padding: 0;
      margin-left: -40%;
      width: 80%;
      height: 400px;
      border: 1px solid #cccccc;
      box-shadow: 0px 4px 4px -2px #cccccc;
    }
    p {
      text-align: center;
      margin-top: 180px;
    }
  `]
})
export class PanelComponent { }
app.component
次にapp.componentです。これは、ng newした際に作成されるものを編集して使っています。
アニメーションの定義もこのコンポーネントで行っています。
検索ボックスから受けたpanelOpenイベントに対してonChangePanelState()メソッドをバインドしています。
app.component.ts
import { Component } from '@angular/core';
import { trigger, state, transition, style, animate } from '@angular/animations';

@Component({
  selector: 'app-root',
  template: `
    <app-search (panelOpen)="onChangePanelState()"></app-search>
    <app-panel @panelOpenTrigger *ngIf="panelState"></app-panel>
  `,
  styles: [],
  animations: [
    trigger('panelOpenTrigger', [
      state('void', style({ opacity: 0.4 })),
      state('*', style({ opacity: 1 })),
      transition('* <=> *', animate('0.2s ease-in-out'))
    ])
  ]
})
export class AppComponent {
  panelState: boolean;

  onChangePanelState() {
    this.panelState = !this.panelState;
  }
}
- テンプレート内の
@panelOpenTrigger、triggerのpanelOpenTrigger- テンプレート内にトリガーを定義してanimationsのtriggerと関連付けを行っています。
- state('void', style({ opacity: 0.4 })),
- アニメーション前の初期状態のstyleを定義しています。
state()の第一引数voidはコンポーネントが表示されていない状態を表しています。
- アニメーション前の初期状態のstyleを定義しています。
- state('*', style({ opacity: 1 })),
- アニメーション後のstyleを定義しています。
*はコンポーネントが表示された際の状態を示しています。
- アニメーション後のstyleを定義しています。
- transition(' <=> ', animate('0.2s ease-in-out'))
transition()メソッドの第一引数には上記のstateに定義した状態の移り変わりを定義しますが、今回は* <=> *で全ての状態の移り変わりをハンドリングするよう設定しています。今回の場合、パネルを開く時、閉じるときで同様のアニメーションを実行します。animate()メソッドで実際のアニメーションを定義しています。ここでは、0.2秒かけてstyleがstate()で定義した状態に変化します。ease-in-outはイージングの種類です。
所感
Angular CDKのExpansion Panelでもそれぽいことができたかもしれない。
そもそもこれぐらいならCSSだけでも出来るかもしれないけど...Angular Animationsの取っ付きとしてはよかったかなと。